Setting up MSDeploy for CI/CD deployments to IIS
Just a few months ago I was 100% sure I’ll never hear about Windows Server ever again, but not everyone is on Kubernetes or even dotnet core yet, so if you are as lucky as me, and have to setup deployment to the IIS server in 3rd decade of 21st century, here are the detailed instructions how to do it.
First Let me first clarify something. There is a product name called Web Deploy which provides 2 main components:
- Command-line tool MSDeploy.exe what we use, to make a deployment to an IIS server.
- A service that must be installed on a server running IIS, where we want to make deployments to.
Just a few tips in advance
- You will need a user account with Admin privileges to perform deployment
- You will need to install IIS Management Service
- You will need to install Microsoft Web Deploy to the server
- You will need NO restarts, quite a surprise for Windows 😁
Install IIS Management Service
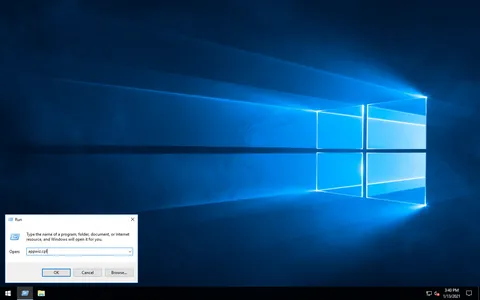
- Run (Win + R) -> appwiz.cpl
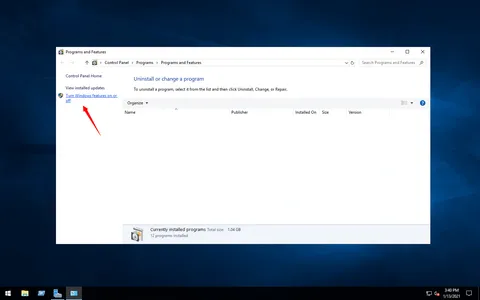
- Click “Turn Windows features on or off”
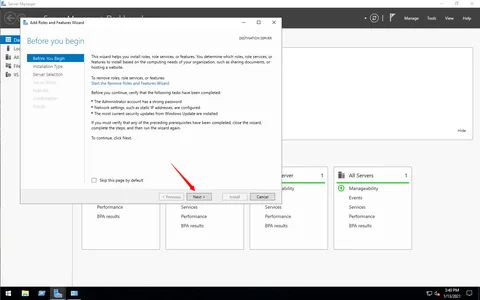
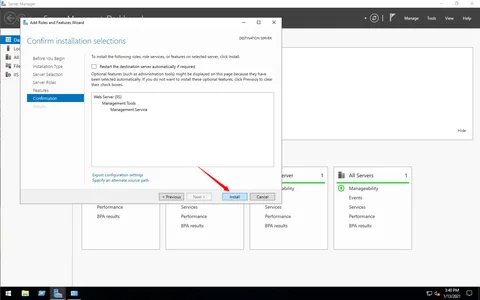
- On “Add Roles and Features Wizard” proceed to “Server Roles” (on non-server versions of windows you’ll be taken to the same screen immediately)
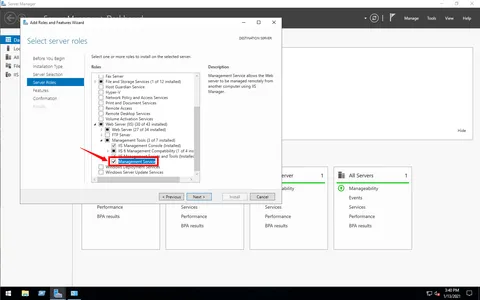
- Select “Management service”
- Proceed to confirmation and press install (appears instead of Next button)
Step by step screenshots:
Install Microsoft Web Deploy
This is a tool that should be installed on both the server (the machine running IIS) and the client (the machine making a deployment).
Getting it is is a bit tricky though. There are two actual versions of web deploy.
-
The latest version Microsoft offers to download via Download Center is Web Deploy 3.6 (which one is obsolete)
-
Visual Studio 2017+ comes with Web Deploy 4 As it doesn’t make sense to install Visual Studio on production servers.
As I found on the MS Developer Community forum you can download a stand-alone .msi for Web Deploy 4 from https://download.visualstudio.microsoft.com/download/pr/e1828da1-907a-46fe-a3cf-f3b9ea1c485c/035860f3c0d2bab0458e634685648385/webdeploy_amd64_en-us.msi if the link is broken, there is a backup copy on my OneDrive.
The versions are not compatible. In other words, you cannot use Web Deploy 4 to deploy to the server with Web Deploy 3.6
Yet another important detail is that the “Typical” installation of MS Deploy doesn’t include the server components. Therefore installing MS Deploy choose either Complete install either Custom and ensure all the components will be installed as shown on the screenshots below.
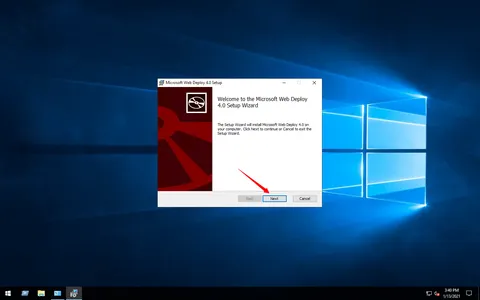
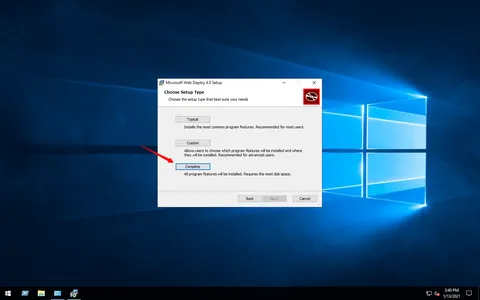
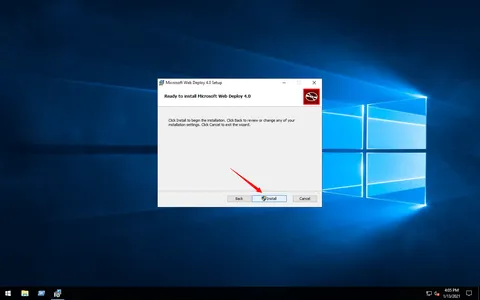
Things to verify
Windows services should be up and running
- Open Services Manager. Run (Win + R) services.msc
- Locate “Web Deployment Agent Service” and ensure it’s started. (this is MSDeploy)
- Locate “Web Management Service” and ensure it’s started.

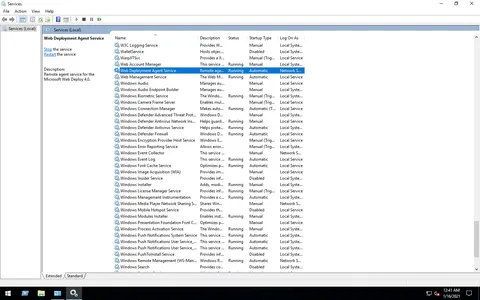
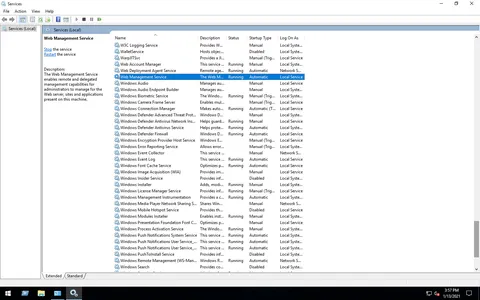
Management service should be present in IIS configuration.
You might also want to adjust some settings
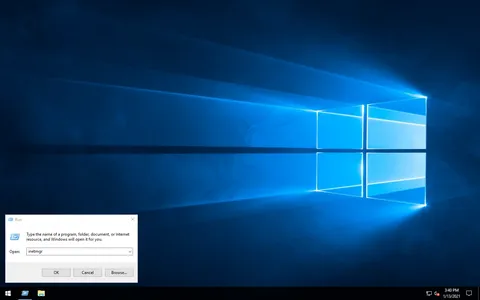
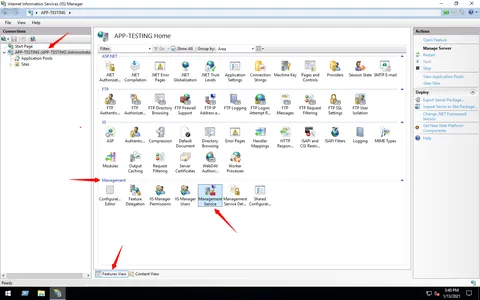
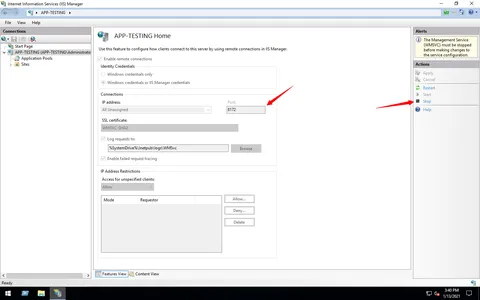
- Open IIS Manager. Run (Win + R) inetmgr
- Locate “Management Service” in the Management section of the Server Features view
If you want to change the settings you’ll need to stop the service using the stop button on the right panel. The interface might seem a bit confusing, but feel free to do so, it stops only the management service itself, not the IIS.
The port should be open
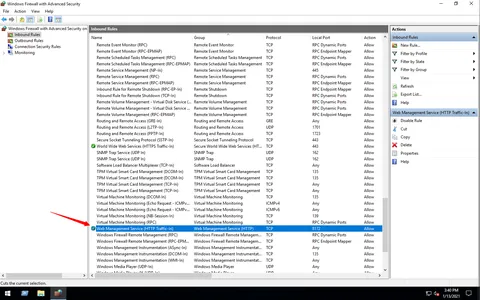
As you could see on Management Service screen in IIS settings, by default it listens to port 8172. The installer also opens the port in Firewall settings for all IP addresses.
- Open Windows Defender Firewall with Advanced Security. Run (Win + R) wf.msc
- Locate “Web Management Service (HTTP Traffic-In)” rule

Pack and deploy legacy asp.net app to IIS
That deploy part is way easier or at least doesn’t require clicks.
To make a package with msbuild
$proejctPath = '.\MyProject.csproj'

msbuild $projectPath `
  /p:OutDir=.\dist\ `
  /p:Configuration=Release `
  /p:GenerateSerializationAssemblies=False `
  /p:DeployOnBuild=true `
  /p:WebPublishMethod=Package `
  /p:PackageAsSingleFile=true `
  /p:IncludeSetAclProviderOnDestination=False `
  /p:AutoParameterizationWebConfigConnectionStrings=false
To deploy using msdeploy
$package = '.\dist\_PublishedWebsites\MyProject_Package\MyProject.zip'
$username = ''
$password = ''
$serverIpOrHostname = '127.0.0.1'
$msDeployPort = '8172'
$endpoint = "https://${serverIpOrHostname}:${msDeployPort}/MSDeploy.axd"
$iisWebsiteName = 'My Website'

# with -whatIf flag provided, msdeploy just shows what's gonna happen without
# remove the line with -whatIf flag to make real deployment
msdeploy -source:package=$package `
     -whatIf `
     -verb:sync `
     -allowUntrusted `
     -dest:auto,ComputerName=`"$endpoint`",UserName=`"$username`",Password=`"$password`",IncludeAcls=False,AuthType=Basic `
     -setParam:name=`"IIS Web Application Name`",value=`"$iisWebsiteName`" `
     -disableLink:AppPoolExtension `
     -disableLink:ContentExtension `
     -disableLink:CertificateExtension
where is msdeploy.exe
Typically it’s: C:\Program Files\IIS\Microsoft Web Deploy V3\msdeploy.exe and yet, no matter how rediculous it is, the Web Deploy 4 is going to be in the same directory :)
where is msbuild.exe
With visual studio installed it should be in C:\Program Files (x86)\Microsoft Visual Studio\2019\Community\MSBuild\Current\Bin\MSBuild.exe Obviously the version number and edition might differ.
However, you don’t have to install Visual Studio, to have MSBuild on a build agent. You can download and install Build Tools for Visual Studio 2019.
